
Table of Contents
Workflow Schedules Version 2.4 and prior
When Bizweaver workflows are in active use (in production), they are at times executed using a schedule. This means that they will execute automatically at a defined time. No user action is required.
A schedule is created by selecting the desired combination of options as described below. If both the schedule and the workflow are enabled, the workflow will execute automatically at the appropriate time.
Be sure to save the workflow after adding/changing a schedule. Saving the workflow is what saves the schedule, not just closing the schedule window.
To create a schedule for a workflow:
- 1. Open the workflow so that it is currently active.
- 2. Click the Schedule link. The link will show when the next execution of the associated schedule is due to occur.

The Schedule Information window opens. This is where the schedule for this workflow is maintained.

- 3. Schedule Name Enter a name for the schedule.
- This is not mandatory and is only seen on this page.

- 4. Note A description of the schedule as needed.
- This is not mandatory but can be helpful in documenting why a particular schedule is being used.

- 5. Start Date and Start Time The date and time, the schedule becomes active.

- 6. Type select the type of schedule.
- Options are Daily, Weekly, Monthly, and One Time Only.

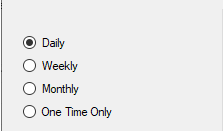
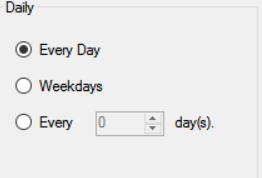
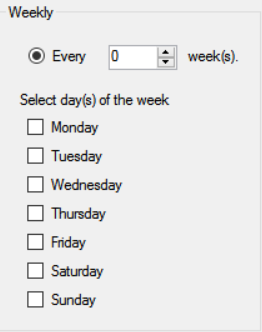
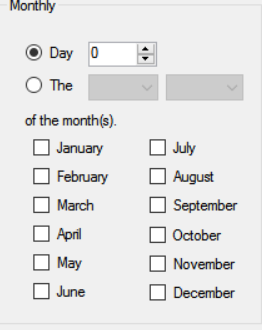
- 7. Type Menu The options in this section change depending on the type of schedule selected.
- Daily

- Weekly

- Monthly

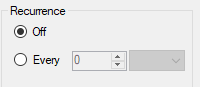
- 8. Recurrence defines how often a workflow should run within a day.
- Options are number of hours or minutes.
- If no recurrence is defined, the workflow will execute once at the scheduled time, and then not be executed again until the next scheduled day.
- 9. Expire The date the schedule expires. There are two different ways you can set a schedule expires.
- Expiration Date Specify the date this schedule expires. The workflow will automatically stop executing on this this date, based on the time or duration specified.
- In most cases the expiration year should be set to something in the future, like 2099. Otherwise, the schedule may not be executed as Bizweaver will see it as expired.
- Expiration Time Expiration time is used to define a specific time at which the schedule should end on the specified date.
- Expiration Duration Expiration duration is a different way to define the expiration time. Rather than a specific time, the duration values define the number of hours & minutes past midnight on the ending date that the schedule should be active.
- For example, assume that the schedule is set to run hourly. The expiration date is set to end on 1/31/2017. If the duration is set to 10 hours & 1 minute, the workflow will be executed ten times. This will bring the time to 10:00 am. At 10:01 am, the schedule will expire and no longer automatically execute.

- 10. Enable

- Select the checkbox to make the schedule active.
- Clear the checkbox to make the schedule inactive.
- The schedule is ignored if it is not active.
Using VBScript and Decisions to Control Schedule
There may be situations where the standard scheduling tool will not accommodate your desired schedule. For example, you may only want the workflow to process data only between 8:00a and 5:00p on weekdays. You can only specify weekdays in the scheduler, but there is no way to defined the time range.
To accommodate this requirement, we can use VBScript and a Decision in the workflow.

The VBScript to check the hour is:
if (Hour(Now())) >= 8 and (Hour(Now())) <= 17 then CalcHour = "Y" else CalcHour = "N" end if

return "doProcess",CalcHour
A Decision is set up to evaluate the “doProcess” variable.
The definition of the decision step is shown below.

Now, if the value = “Y”, the processing will continue. Otherwise, the cycle will end.


