
This is an old revision of the document!
Table of Contents
Workflow Schedules Version 2.5 and after
When Bizweaver workflows are in active use (in production), they are at times executed using a schedule. This means that they will execute automatically at a defined time. No user action is required.
A schedule is created by selecting the desired combination of options as described below. If both the schedule and the workflow are enabled, the workflow will execute automatically at the appropriate time.
Creating a Schedule
To create a schedule for a workflow:
- 1. Open the workflow so that it is currently active.
- 2. Click the Schedule link. The link will show when the next execution of the associated schedule is due to occur.

- The Schedule information window opens. This is where the schedule for this workflow is maintained.
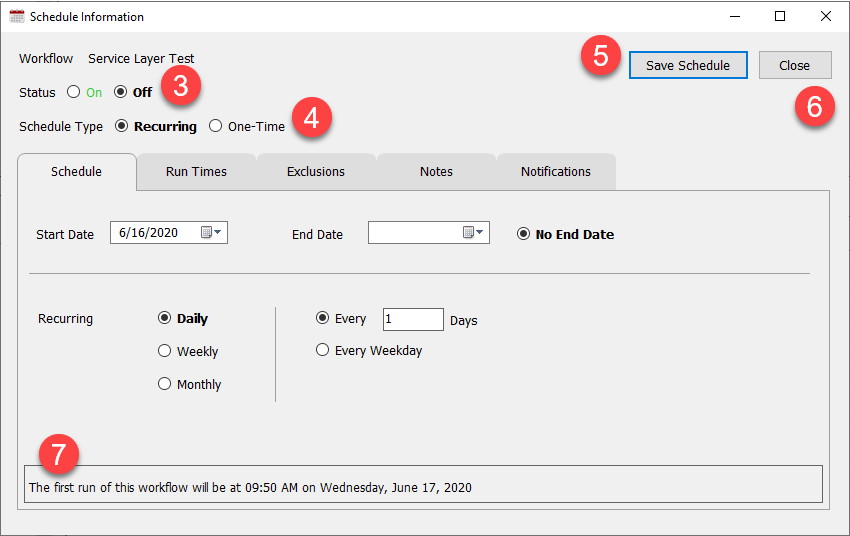
- 3. Status Indicates if schedule is on or off.
- Schedule will not run if off is selected
- 4. Schedule Type
- Recurring - defines the occurrence of a workflow over multiple days
- One-Time - defines the occurrence of a workflow on a single day
- When running a One-Time schedule the scheduler display will change, and only one date can be selected this will be the date the schedule runs. Below are the tabs that will be displayed for modification.
- 5. Save Schedule
- This will save the schedule and the workflow.
- The Save workflow compiler will open once this button is clicked.
- 6. Close
- This will close the schedule and no changes will be saved.
- 7. Message
- This message will show the first run of the schedule based on current setting.
- This message will display on the Schedule Tab and Run Times Tab.
- This message will change if Run Continuously or Run Every is selected
Schedule Tab
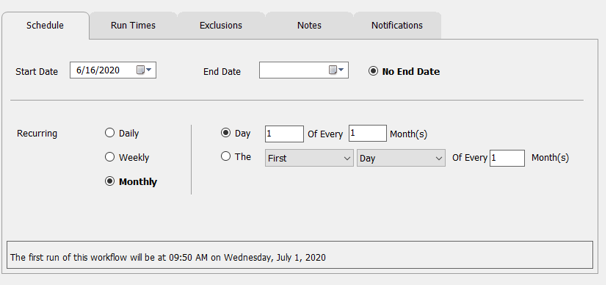
- 1. Start Date and End Date define when the schedule starts and ends.
- Start Date will default to the current date.
- When a pre-existing schedule is opened, the start date will reflect the current date. This will be the new start date when the schedule is saved (it cannot be back dated). If Cancel is selected or the scheduler window is closed, the start date will remain as it was.
- No End Date option is used if you do not want the schedule to have a set end date.

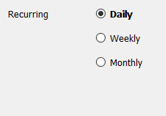
- 2. Recurring select the type of schedule.
- Options are Daily, Weekly, Monthly.
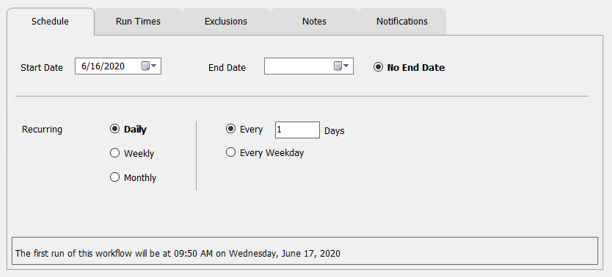
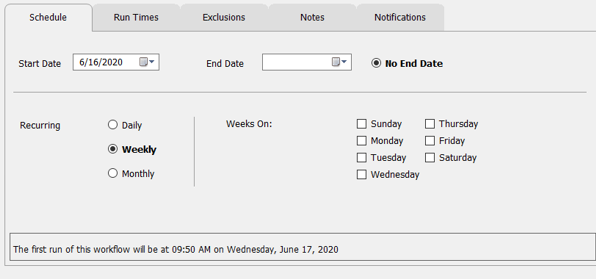
- 3. The options in this section change depending on the type of schedule selected.
- Daily
- Weekly
- Monthly
Run Times Tab
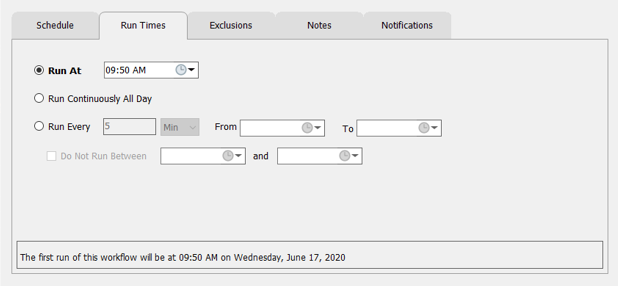
- 1. Run At defines a specific time a schedule should run during a day.
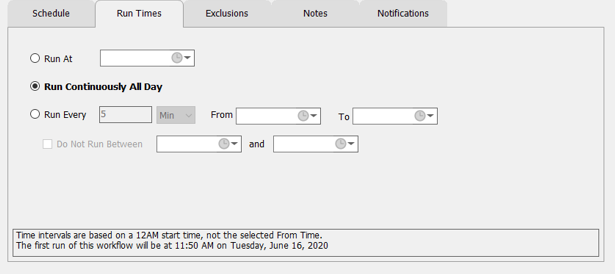
- 2. Run Continuously defines a schedule running all day during the selected schedule type
- Run Continuously time intervals are based on a 12:00 AM start time. This interval runs every 5 minuets.
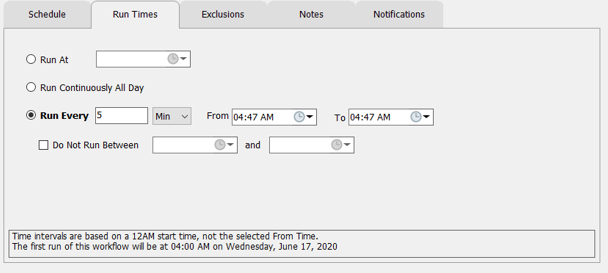
- 3. Run Every defines a schedule running during a set interval of time
- Bizweaver uses the indicated interval period (ex. 5 mins, 12, mins, 20 minutes, i.e. whatever the user enters) calculated out from 00:00 to determine the actual first run of the workflow within the selected From-To range.
- The From and To times can only be selected within a given date and cannot span multiple dates/days
- Example: Run Every 7 Min From 02:00 AM To 04:00 AM. The first run of the workflow will be at 2:06 AM. 00:00 + 18 intervals of 7 min = 02:06 AM The last run of the workflow will be at 3:57
- Minutes - Can choose from 5 to 59 minuets as an interval
- Note the interval period cannot be longer than the From To period
- Hours - Can choose from 1 to 23 hours as an interval
- Note the interval period cannot be longer than the From To period
- Do Not Run Between - defines a period that the workflow will not run within any given schedule.
Exclusions Tab
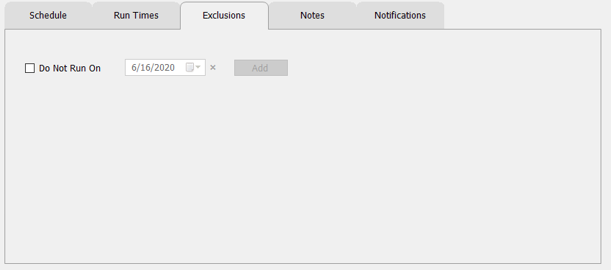
Exclusions are dates (full days) that you can apply to any given schedule on which the workflow will not run. The maximum amount of exclusions is 10.
- 1. Do Not Run On defines a specific day that the workflow will not run.
- Clicking the add button adds another exclusions.
- When the exclusion date has passed the “X” will change to red.
Notes Tab
This tab allows notes to be entered for a schedule.

Notifications Tab
Notifications can be sent to a designated email address when a workflow has started or ended. Up to 3 email addresses can be designated.
The act of restarting the Bizweaver Service triggers these email notifications to be sent for all enabled workflows.

- 1. Send Notifications To
- Send Email Using - defines the SMPT connection to be used for sending the emails.
- Email Address - defines the email that will receive the notification.
- Add Another - the user can add up to 3 email addresses.
- 2. Send Notifications
- When workflow starts - this will send an email immediately after the workflow starts.
- When workflow ends - this will send an email immediately after the workflow finishes.


