
versago:create_new_form
This is an old revision of the document!
Table of Contents
Create a New Form
- Click on the Forms (v2) link in the Admin console to begin.

Form Setup/Form Details
When a new form is created the starting point is the Form Setup page. This page is also used as needed when maintaining an existing form to update some information.

- Form ID is a number assigned by the application when a new form is created. The ID is displayed on this page once the form has been added.
- Name is the text displayed to the user in the Versago menus while Title is the text displayed at the top of the form page.
- These values are required but can be updated at any time.
- The two values can be different if appropriate.
- Category is selected from the list of grouping categories created for Versago reports.
- The value is required but is not used for grouping as is done with reports.
- Select a value from the existing groups or enter a new value.
- Roles are the groups of Versago users that have access to this report.
- At least one role must be selected to save the report.
- Multiple roles can be assigned as appropriate.
- Associated roles can be changed at any time.
- The [Show Dependencies] button opens a new page that helps validate that any reports used in the form (for lookups) are associated with the roles assigned to the form.
- This function should be executed once the form is essentially complete, or when any report-based lookups in the form are changed.
- Form Type indicates the type of form to be created.
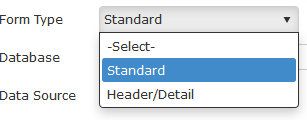
- A Standard report has only a single “level” of data.
- A Header/Detail report utilizes a main (header) data and a section that captures associated rows of details. A common example of this type of form is a Sales Order, where the Header captures the customer information and the Detail section captures a row for each item being sold.
- This option is only used when creating a new form.
- In the image above, the Standard form type has been selected.
- Database defines where the SQL tables used by this form are/will be located.
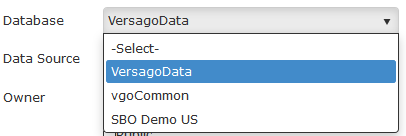
- The databases listed for selection have been previously defined in the “Databases” configuration function.
- This option is only used when creating a new form.
- In the image above, a database named VersagoData has been selected.
- Data Source identifies the source of the associated database tables when a form is created.
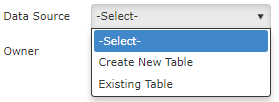
- A new table (or tables) can be created as part of the initial configuration OR table(s) that already exist in the database can be used.
- This option is only used when creating a new form.
- The appropriate setup page(s) are automatically displayed when the data source option is selected.
- See Creating Tables for Versago Forms for additional information on creating tables for use with Versago forms.
- Owner is the person “responsible” for this form.
- The owner is automatically set to the user that creates the form but can be set to any other administrative user if desired.
- This reference is for information only and does not affect the operation of the form.
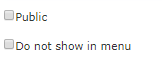
- Select the Public checkbox if you want the form to be available to anyone prior to logging into Versago.
- Select the Do not show in menu checkbox if you do not want the form to appear in the standard Versago menu structure.
- This restriction only applies to the standard menu structure. Since the form needs to be explicitly associated with a custom menu, this option does not apply in those cases.
- Use of this option is helpful if you have a form that you want to be accessed via an Action link in a Versago form but not available to users in the menu structure.
- Select the Read Only option to make the form so that it can be viewed but no data can be entered. See Read-Only Forms for additional information.


Other Buttons on the Form Setup Page

- Use the [Next] button to move to the Form Layout page. This button is only available for existing forms.
- Use the [Back] button to return to the Forms listing page.
- Click the [Add New Form] button to begin the new form creation process.
Do not use this button to save new form information that has been entered on this page. Any information on the page that has not been saved will be lost.
- Click the [Clone Form] button to make a copy (clone) of an existing form. See Clone a Form for more information.
- Click the [Show URL] button to see the URL used to open this form. This information is used to open the form from a Versago report Action link, or another Versago form. This button is only displayed for forms that have already been added.
versago/create_new_form.1564675620.txt.gz · Last modified: 2019/08/01 12:07 by runger
Except where otherwise noted, content on this wiki is licensed under the following license: CC Attribution-Noncommercial 4.0 International


