
This is an old revision of the document!
Table of Contents
Installation Instructions
Confirm that Versago's environment requirements have been met.
Configure IIS
Note that it will be necessary to restart the server as part of the installation process. This should be considered if you have other applications running on the server where Versago will be installed.
IIS is configured in the Windows Server Manager application. It is configured in the IIS (WebServer) role. There are a number of elements to the configuration. Many of the are selected automatically when you activate the IIS role and some need to be selected manually. The following images illustrate that setting that must be enabled for Versago and Bizweaver. Your IIS page may differ slightly from this illustration depending on the version of Windows & IIS being used. In addition, the .Net Framework v4.x version should be the one noted earlier, not the one in the illustration.
IIS Top Level

Management Tools

Common Features Section

Health & Diagnostics Section

Performance Section

Security Section

Application Development Section

Confirm that ASP.NET components are installed. ASP.NET 4.7 (or higher) should be active.
License Requirements
The Versago license is verified automatically. There are two requirements for the license process.
- Your Installation ID must be on file in the Third Wave Business Systems license system.
- An active Internet connection to allow communication with the Third Wave license server. The connection must allow access to https://license.twbs.com:443.
Information You Will Need
- The name/IP address of the server(s) hosting Versago
- The name/IP address of the server where SQL Server is found
- The user name & password for a SQL Server user with database administrator security.
- Third Wave recommends that a specific user be created for Versago rather than using the ‘sa’ user.
- The desired communication port to be used by Versago. This can be any available port based on your network configuration. The default port is 443 for SSL.
- Versago interacts with SQL server so the standard communication port (1433) will need to be open between the Versago server and the SQL server.
- When working with a HANA database, the standard port 30015 will need to be open as well.
- An initial Versago user that will act as an administrator. You will need to provide:
- Email address
- First name
- Last name
- Company name
- Country
- Password
- Confirm that your SAP Business One Site ID is set up in Third Wave’s system. This value is used for licensing. You can check to see if it is set up on the TWBS portal (https://portal.twbs.com).
Installation
- Execute the “setup.exe” file in the installation package. This will start the installation process.
- Always use the right-click > Run as administrator option to execute the installation.
- Click [Next] to continue from the first screen that is presented.
- Review and accept the End User License Agreement (EULA) that is presented.
- Click [Next] to continue.
- Confirm or change the installation location of the Versago files.
- Click [Next] to continue.
- Set installation options
- Enter the site's port. The default port for SSL is 443
- Select the desired certificate from the drop-down.
- Click [Next] to continue.

- Various screens will be displayed as different components are installed. This may take a while.
Configure Database
This step identifies information about the database server that will be used by Versago to store configuration information. This can only be a SQL Server database.
- Enter the database\instance name of the database server.
- Enter the name of the database that will hold Versago configuration information. This can be an existing database or a new database. Typically the database name is “vgoCommon”.
- Enter the user name and password that will be used to connect to the database. This can be any user provided the user is associated with the “sysadmin” security role (SQL Server).
- Note that only SQL Server Authentication is supported. Windows Authentication cannot be used for this purpose.
- Click [Next] to continue.
- There will be a delay of several seconds while the database and associated tables are created.

Configure Admin User
This step establishes an initial administrative Versago user for your site.
Always use a valid email address as your initial administrative user. The only way to reset the password of any user is through the “Reset Password” function, which sends an email to the user.
- Enter a valid email address (user).
- Enter and confirm a password.
- A strong password is required. The requirements are displayed below the password field.
- Enter user details.
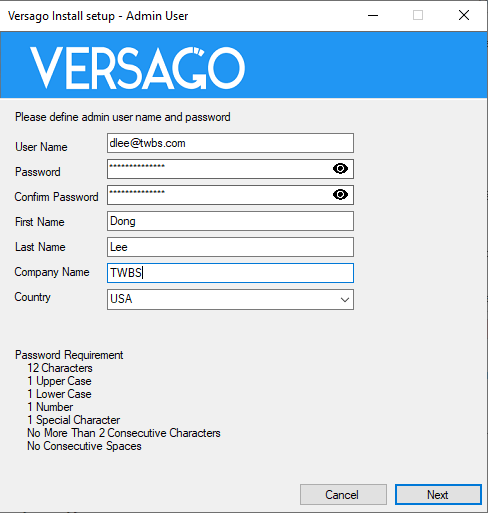
- Click [Next] to continue.

- The final installation page provides the option start Versago.
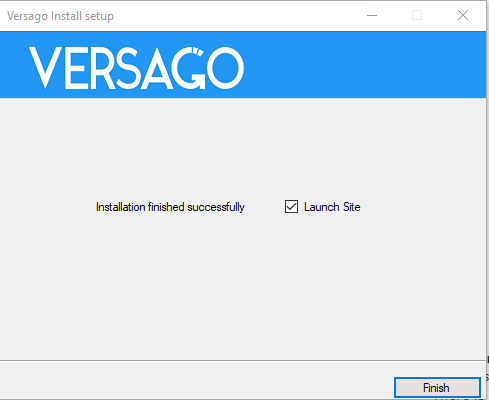
- Click [Finish] to complete the initial installation.
- The Versago home page is opened using “localhost.”
- There is a delay of several seconds while the initial configuration completes
- Once the Versago login/password fields are accessible the basic installation is complete.

Depending on your browser, you may receive a message that the “site is not secure.” This generally occurs when you are using a self-signed certificate. There should be an option (you may have to look for it) to acknowledge the issue and continue. This most commonly is found with the Chrome and Firefox browsers.
Some security software may affect the installation of Versago. Please review your antivirus logs to ensure that no Versago files have been quarantined
Register .NET Framework with IIS. Make sure that .NET Extensibility and ASP.NET are selected under Web Server>Application Development
Final installation Steps


