
This is an old revision of the document!
Table of Contents
Users
Users in Versago identify specific persons that can access the Versago environment and use its various functions.
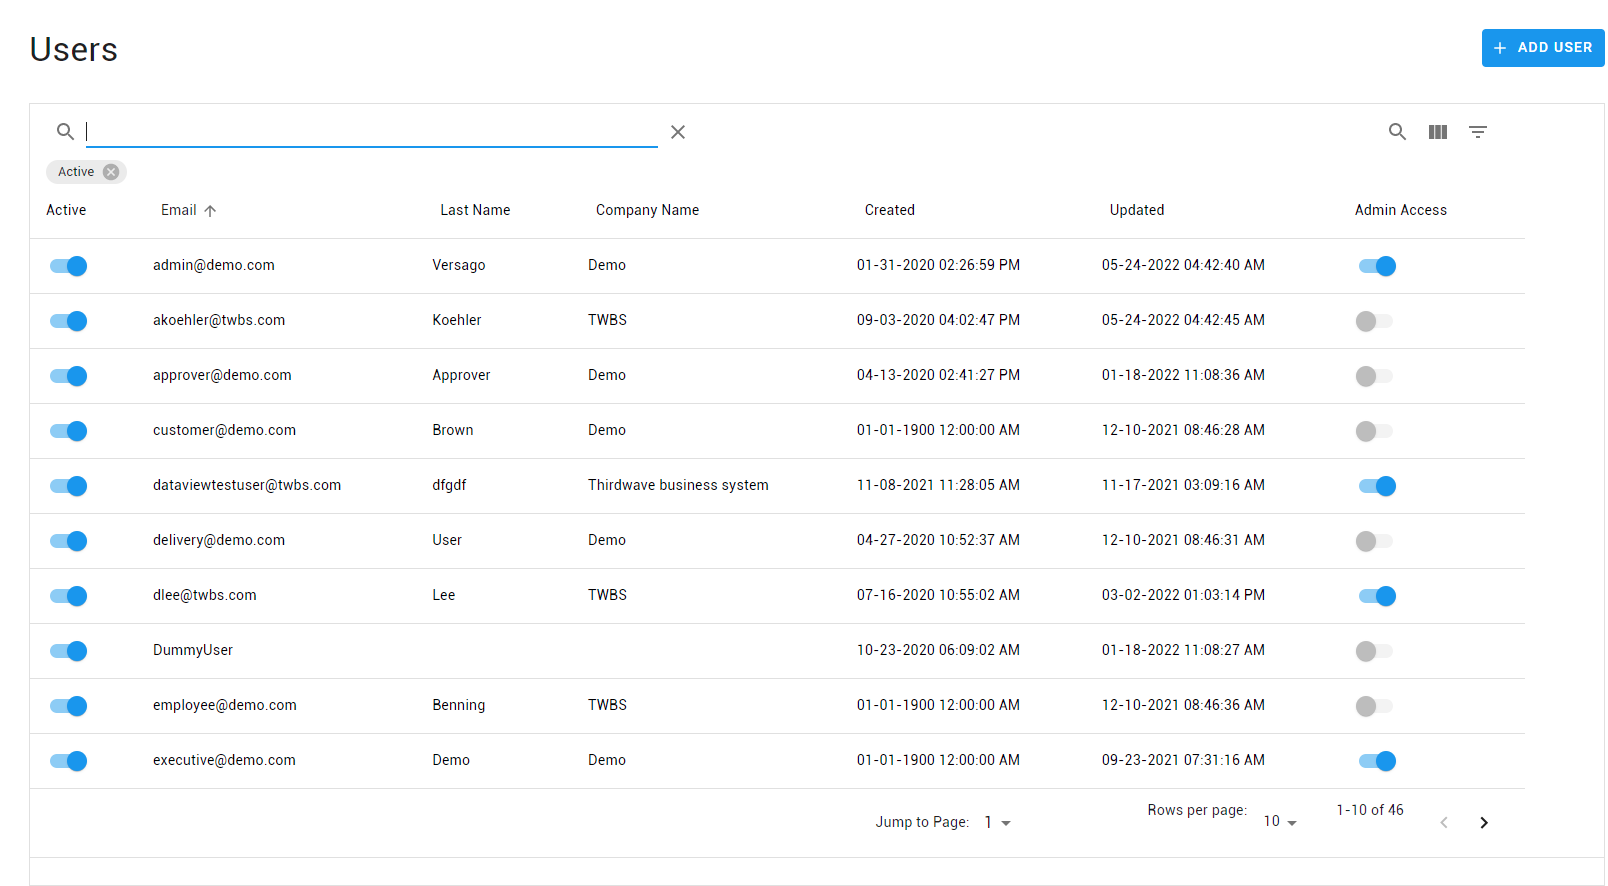
The Users page provides a list of existing users in the system
- Click the [Add User] button to create a new user.
- Click a row in the listing to edit a user.
- Toggle the [Active] switch to activate/inactivate a user.
- Remove the filter for Active users to list all users.
Use the standard icons to the search, filter and show/hide columns.
Add/Edit User
- Fields marked with * are required. All other values are optional.
- The Email field cannot be changed once the user has been added.
- The initial password can be set when creating a user. However, passwords cannot be changed by the admin once the user has been created.
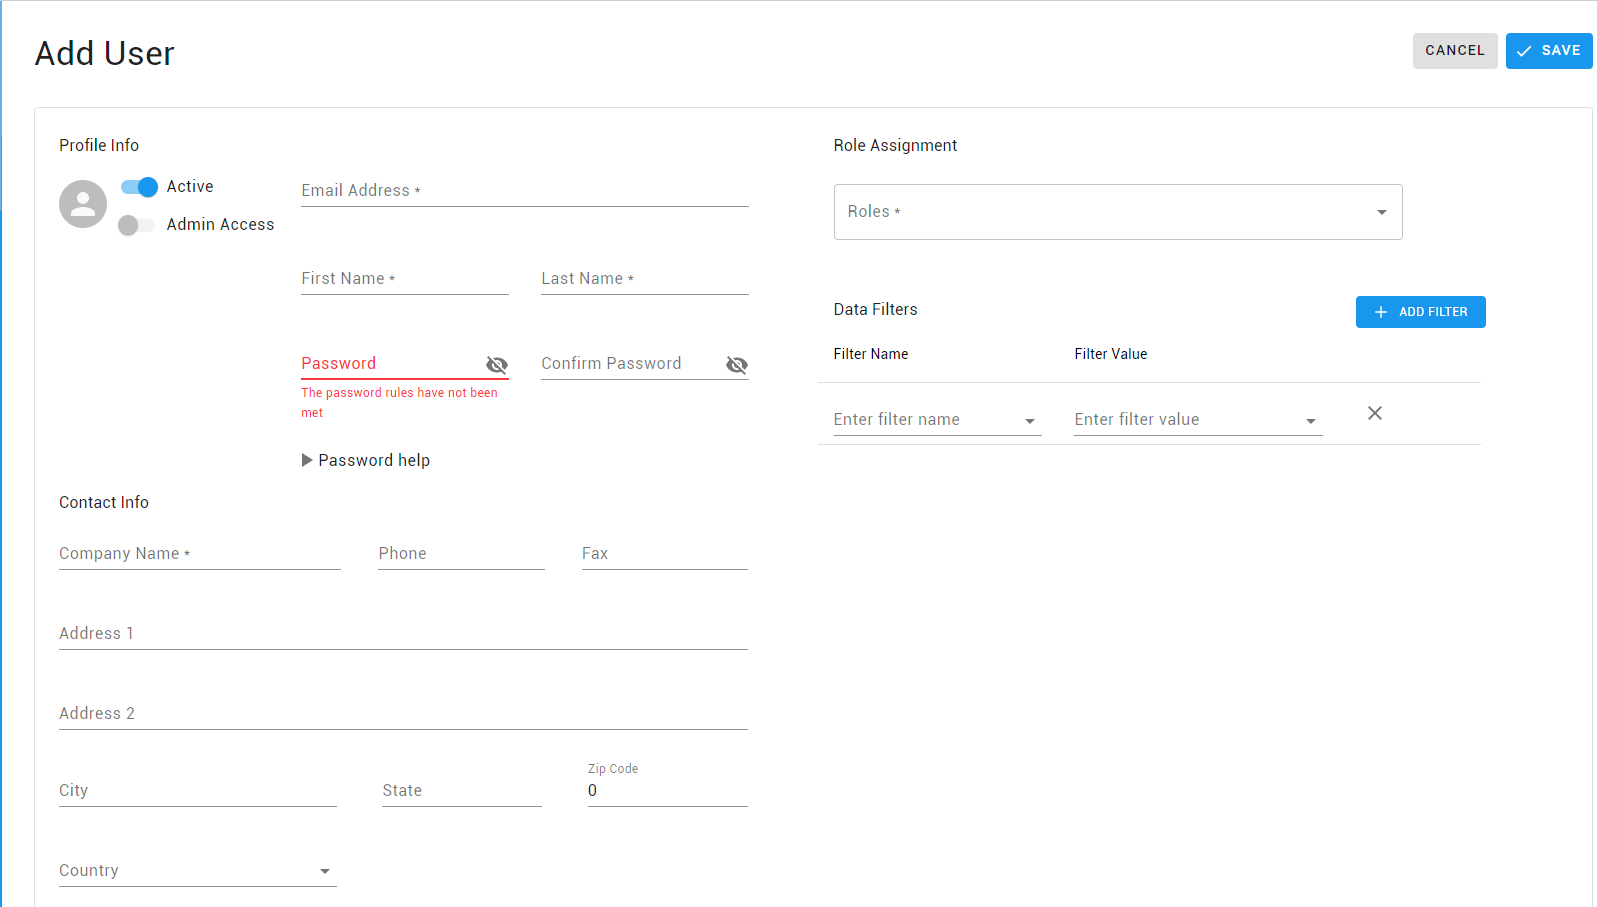
- Email is the key identifier for a user.
- The email must be unique within Versago.
- The email is not verified. This value must simply have the normal structure of an email address (e.g. name@domain.com)
- Password is the password to be used by this user.
- The password must conform to the rules established by Versago.
- Passwords are encrypted when they are stored in the database. A forgotten password cannot be recovered and must be reset.
- The Admin Access switch indicates if the user has access to the Admin Console.
- The Active switch indicates if the user is active in Versago.
- The Role highlighted in green denotes the Default role used for initial Menu display
- Add applicable Account Filters. Versago will filter all Data Views for the user if there is a matching field between the Account Filter and the Data View. Refer to Implementing User Account Filters for more details
Your Versago license limits the number of active users. If you exceed the number of licensed users, an error message is displayed. Contact Third Wave if you need to upgrade your Versago license.
Roles
Roles define user access to Configured Content. Every user and object must be associated with at least one role.
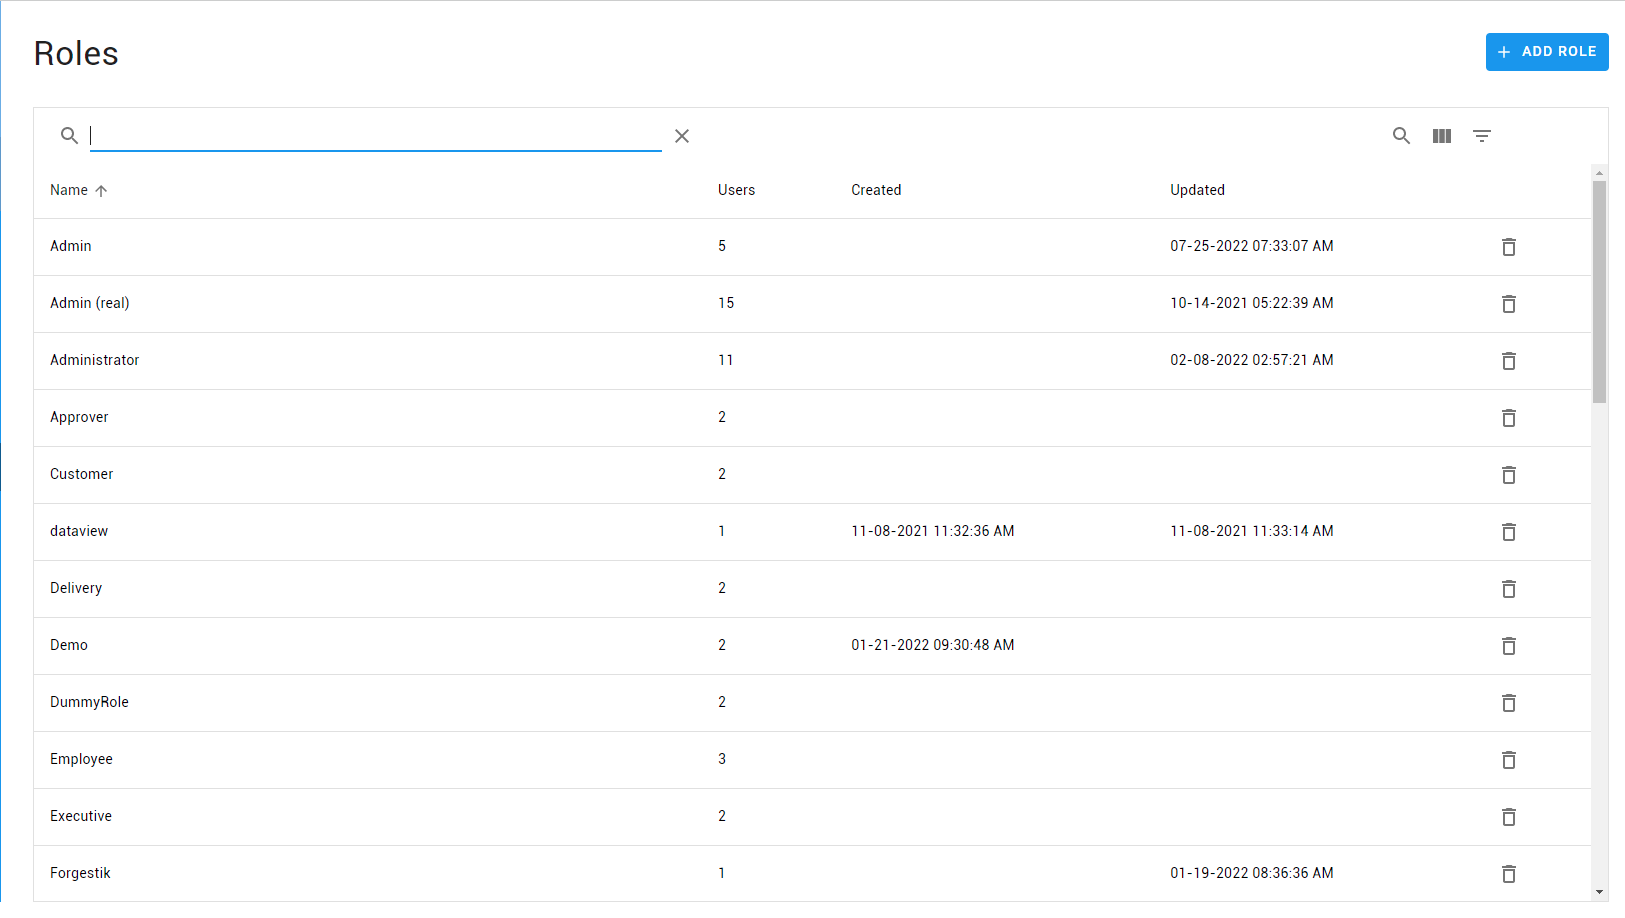
The Roles page provides a list of existing roles in the system
- Click the [Add Role] button to create a new user.
- Click a row in the listing to edit the role.
Add/Edit Role
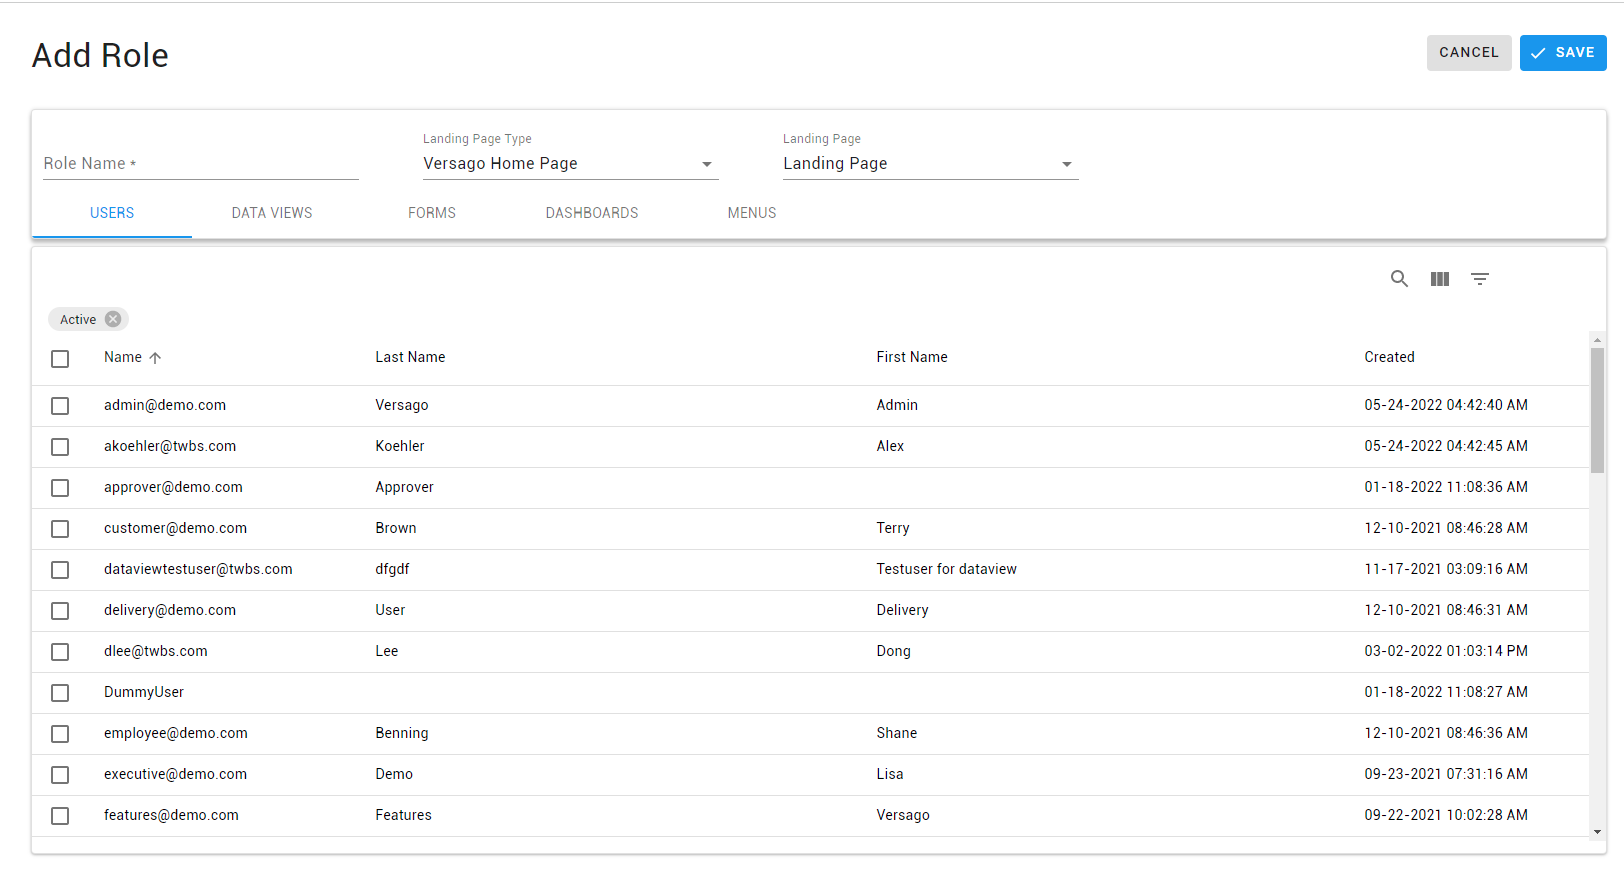
- Landing Page Type specifies what object type is displayed to the user associated with this role when first logging into Versago.
- Landing Page specifies the object for the home page. The options available are only those already associated with the role. If the user is associated with more than one role, the landing page of the default role is used.
- Navigate through the tabs to select users and objects for the role.
User Account Filters
User Account Filters are used to filter Data Views that contain a field that matches the account filter. It allows to control row-level data access for each user.
For example, assume you have a Data View that lists customer invoices. You want to allow your customers to log into Versago and only see a list of their invoices. By using a Account Data Filter in the Data that filters on the customer code associated with the user you can automatically limit the invoices in the list to those that have reference the user’s customer code.

The User Account Filters page provides a list of existing account filters in the system
- Click the [Add Filter] button to create a new user.
- Click a row in the listing to edit a filter.
Add/Edit User Account Filters

- Name is the unique name for this profile.
- Connection is the database where the table that holds the filtering values is located.
- Datasource is the data table from the previously selected connection where the filtering values are located.
- Field is the specific column from the data source that stores the filtering values
Implementing User Account Filters


